
How To Find The First Point Of Failure In a PLC-HMI-Instrument System
.webp "how-to-identify--PLC-fault-location")
1st October, 2026.
In this post, we will see the concept of the features generally used in a managed switch.
Understand the complete signal path before troubleshooting:
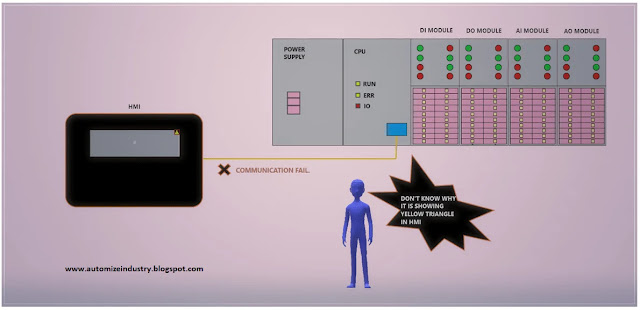
When a PLC-HMI-instrument system develops a problem, the
first mistake is to focus on the component on which the problem is most
obviously evident and assume that it is the component at which the problem
originated. An example is an HMI that displays a tank level of 0%, even though
the tank is half-full, and the temptation to investigate the HMI tag or
communications. The HMI is merely the final manifestation of the signal; the
failure could have occurred anywhere along the signal path.
Before beginning to troubleshoot, the first task is to
understand the full signal path. An analog signal might pass through the
following components: Level Transmitter → Field Cable → Junction/Marshalling
→ PLC Analog Input → PLC Tag → PLC Logic/Scaling → HMI Tag → HMI Display. A
digital signal might involve: Pressure Switch → Field Wiring → PLC Digital
Input → PLC Input Tag → PLC Logic → HMI Status. An output command might
pass through: HMI Start Command → HMI Tag → PLC Command →
Permissive/Interlock Logic → PLC Output → VFD/MCC → Motor.
The above lists give us a series of points to check. The
key question is not "Which component is faulty?", but "At which
point does the signal first diverge from its expected value?". The
distinction is crucial and is the essence of this troubleshooting methodology.
Let us take the example of the HMI displaying an incorrect
tank level of 0%. We perform the following checks:
1. Check Point Expected Condition
2. HMI display Correct level displayed
3. HMI tag Correct value received
4. PLC tag Correct level value
5. PLC analog input Correct raw input
6. Field wiring Signal reaches PLC
7. Transmitter Correct output signal
8. Process Actual tank level matches measurement
This approach isolates the problem to a particular segment
in the signal chain. If the PLC tag is correct, then the failure must lie in
the HMI tag or in the HMI display. On the other hand, if the transmitter is
generating 12 mA and the PLC input is correctly registering this as a 50%
level, but the PLC tag is indicating 0%, the error is likely to be in the PLC
logic or tag. Once the signal path is fully understood, the next task is to
establish the expected value of the signal at each point. This is necessary to
decide whether the signal is normal or abnormal at any given point in the
system.
Define the expected condition before checking the actual condition:
After understanding the signal path, we must decide what
should happen at each point in that signal path. It seems simple, but it is a
crucial step to establishing the first point of failure. We must know what the
expected value or status is to determine if a particular point is functioning
correctly
For instance, we have a level transmitter connected to a PLC
analog input. Our signal path could be something like: Tank Level →
Transmitter → 4-20 mA → PLC Analog Input → Engineering Value → HMI. Let’s
assume that our tank level is approximately 50%, and we would expect:
1.
Transmitter: Approximately 12 mA
2.
PLC Analog Input: Corresponding Raw Input Value
3.
PLC tag: Approximately 50%
4.
HMI: Approximately 50%
Compare the values at different points in the signal path.
Suppose our transmitter is registering 12 mA, but the PLC input is registering
the value of 0 mA; we have already isolated the problem to the loop between the
transmitter and the PLC input.
Similarly, our pump start-up sequence could be HMI Start
→ PLC Command → Permissive → Interlock → PLC Output → VFD → Motor. When the
operator presses Start, we need to know what should happen. For example, these
are the expectations:
1.
HMI start command should change state.
2.
PLC should receive command.
3.
Required permissive conditions should be
satisfied.
4.
No blocking interlock should be active.
5.
PLC output should be ON.
6.
VFD should receive command.
7.
Motor should start.
We have a chain of expectations. Instead of saying,
“Well, the PLC should start the pump,” we need to break it down into individual
expectations that we can check to see where things are going wrong.
Using a simple troubleshooting sequence as below can help:
1.
HMI command expected is ON and actual is ON.
2.
PLC command expected is ON and actual is ON.
3.
Permissive expected is ON and actual is ON.
4.
Interlock expected is Not active, but actual is
active.
5.
PLC output expected is ON but is OFF.
In this case, I don’t need to check the VFD or the motor
yet. I need to deal with the interlock first before proceeding further. The
first abnormality was at the interlock. So, before looking for a fault, we must
decide what the signal or condition should be at each important point in the
signal path. After that, we can concentrate on checking the signal in sequence
and finding the first point that does not match our expectations.
Trace the signal one point at a time:
Now that we have our signal path and expected conditions
established, it's time to start troubleshooting at our first point. It's
important that we only check one point at a time. The intent is not to check
everything at once, but to progress through the signal path comparing expected
vs. actual condition at each point.
For example, let's look at this simple measurement: Level
Transmitter -> PLC AI Channel -> PLC TAG -> PLC Scaling -> HMI TAG
-> HMI Display. Let's say we need to troubleshoot this signal chain. Our
HMI is displaying 0%, while our actual tank level is about 50%. I'm sure
many of us would start by checking the configuration of the HMI, but let's walk
through each step.
Step 1 - Check the HMI Tag - Is the HMI showing 0% because
it's receiving 0%, or is the HMI incorrectly displaying the value?
Step 2 - Check the PLC tag - If the PLC tag is also 0%, then
we can assume the issue is not present in the HMI display.
Step 3 - Check the PLC AI - Is our PLC input receiving the
signal we expect from the field?
Step 4 - Check the physical instrument signal - Measure the
transmitter output. Is the mA output matching our expected value? If the
transmitter is a 4-20ma signal and it's producing approximately 12mA, it's
likely working as designed.
Now, we've isolated something very important, we now have
boundaries around the fault. In this case, if our transmitter is producing a
correct current signal while our PLC input is not, there's no reason to check
the HMI at all. The issue must be somewhere in the signal path between the
transmitter and the PLC AI.
The same troubleshooting technique can be applied to digital
signals and commands: HMI Start -> PLC Start Command -> Permissive
-> Interlock -> PLC Output -> VFD -> Motor. Again, we check the
conditions in order, not jumping to the "motor" or "VFD"
just because they're downstream. A good rule of thumb is following the
signal, not your assumptions of where the fault may be. Another great
benefit is that this technique almost eliminates the possibility of adjusting
before we know if something is faulty. The checks we make at each step
are only meant to answer one question: "Is the signal correct at
this point?"
Once we've answered that, we move on to the next check. If
the signal is incorrect, we investigate further into that segment. This brings
us to the most important part of troubleshooting - now we are at the first
point where the expected doesn't match the actual. That is the root cause of
the fault, and it should be investigated.
Find the first point where the signal becomes wrong:
This is the most crucial step to the entire troubleshooting
method. While tracing the signal, you'll find a point where the previous point
was correct and the following one is not. That's your first point of failure. Example:
Transmitter → PLC AI → PLC Tag → HMI.
Where we might see something like this:
1.
Transmitter output expected is 12 mA and actual
is 12 mA
2.
PLC AI channel expected is Equivalent to 50% and
actual is 0%
3.
PLC tag expected is 50% and actual is 0%
4.
HMI tag expected is 50% and actual is 0%
So, while the transmitter output is okay, the PLC analog
input isn't registering it correctly, resulting in the wrong value in the tag
and, subsequently, the HMI, which is a much easier place to suspect a problem
than the PLC electronics. So, the first abnormal point is between the
transmitter output and the PLC analog input. That's much more useful than
simply saying "the PLC is showing wrong level" - you narrowed the
possible causes to a particular segment of the chain.
Another example might be for a motor command: HMI → PLC
Command → Interlock → PLC Output → VFD. So,
a command sent from the HMI is ON, the PLC receives it, but due to an interlock
being active, the output from the PLC remains OFF even though the command was
received correctly. In this case, the motor itself is not necessarily the place
to start looking - the abnormal point is the Interlock logic. Think
of it as a boundary.
Imagine you have Correct → Correct → Correct → ❌
Wrong → Wrong → Wrong. The first ❌ is the place you're most likely
to troubleshoot next. That doesn't mean that this device is faulty, though - it
could be any part of the signal chain between the last correct point and this
one: wiring, configuration, power supply, channel faults in the PLC, etc.
The first point simply helps you identify the segment in which the abnormality
was first observed. This is important because troubleshooting is much easier
when you can focus on a small segment of a larger chain. The first point of
failure is not necessarily the failed component. It is simply the first point
at which the actual condition differs from the expected condition. Having
established it, you can greatly narrow the focus of your troubleshooting
efforts to the segment between the last normal point and the first abnormal
one.
Separate a signal problem from a logic problem:
After identifying the first point of abnormal signal, the
next question is - Is it a physical signal problem, or is the PLC processing
the signal incorrectly? It is particularly important to differentiate between
the two, as the PLC might process a correct physical signal incorrectly due to
programming, scaling, mapping, permissive, or interlocks. For example: Pressure
Transmitter → PLC Analog Input → PLC Tag → PLC Logic → HMI.
If the transmitter is healthy (producing 4-20 mA as
expected) and the correct raw value is read in the PLC input channel, but the
engineering value tag is incorrect, then the physical signal is fine, and the
root cause should be investigated in:
1.
Incorrect scaling
2.
Wrong input channel mapping
3.
Incorrect data type
4.
Incorrect tag assignment
5.
PLC logic modifying the value
6.
Incorrect engineering unit conversion
Similarly, with Motor Command: HMI Start → PLC Command →
Permissive/Interlock Logic → PLC Output. If the start command reaches the
PLC but the motor output remains off, you should check if permissive are
satisfied, if any interlocks are active, or any other condition is deliberately
preventing the motor from starting. This approach avoids one of the most
common troubleshooting mistakes: changing or testing hardware when the problem
is in the PLC program or changing PLC program when there is a fault in the
field.
One common approach is to divide the system into two main
parts:
1.
Physical side: Instrument → Wiring → Terminals →
I/O channel
2.
Control side: PLC tag → Logic → Interlocks →
Outputs → HMI/SCADA
The first step in troubleshooting should be to identify
which side is abnormal. This divides the possible causes into a smaller subset.
Once a side is identified, the next step is to troubleshoot within the subset. Before
changing any hardware or PLC logic, make sure that the PLC is not receiving
wrong information or processing correct information incorrectly.
Verify the suspected point before calling it the failure:
Finding the first abnormal point is one thing, but abnormal
reading doesn't necessarily prove the cause. For example, if your PLC analog
input is 0% and your transmitter should be indicated 50%, then it would be very
easy to assume that your analog input module is faulty. There are many other
possible causes such as a broken wire, loose terminal, bad channel, loss of
instrument power, etc. Once you find the first abnormal point, verify it with
an independent test. For an analog signal you could:
• Measure the transmitter output with a calibrated
multimeter
• Compare the voltage/current at various terminals
• Compare channels to another working channel
• Check the PLC I/O diagnostics
• Verify the channel configuration against your project
documentation
or
For a digital signal, you could verify the physical device
status vs. the PLC input status. If the physical device is ON and the PLC input
is OFF, you can't just immediately assume that your PLC is faulty, you must
check wiring and input circuits first. The same goes with PLC logic. If the
output isn't turning ON, first make sure the command, permissive, interlocks,
and conditions are all satisfied online before you start changing your PLC
program.
The basic format is always: Observation -> Suspected
malfunction -> Independent verification -> Proven cause -> Correction.
This extra step is crucial to avoid replacing large amounts of expensive
hardware needlessly. Besides saving money, this extra verification is important
because it enforces the idea that a single momentary anomaly shouldn't be fixed
by a permanent solution. Finding where the signal becomes abnormal tells
you what to look at, but verifying it tells you what is wrong.
Use the last known good point to narrow the search:
Once the first abnormal point has been identified and
confirmed, use the last known-good point to further narrow the investigation. This
is especially useful when there are multiple components between the healthy
signal and the abnormal signal, for example: Transmitter → Junction Box →
Marshalling Terminal → PLC Terminal → I/O Channel.
With the values:
·
Transmitter output = 12 mA - correct
·
Junction-box measurement = 12 mA - correct
·
Marshalling terminal = 12 mA - correct
·
PLC terminal = 0 mA - incorrect
It is now clear that the fault must be somewhere between the
marshalling terminal and the PLC terminal, and there is no need to waste time troubleshooting
the transmitter, PLC program or HMI at this point. This can greatly reduce the
time taken to troubleshoot the system.
The same concept applies to troubleshooting communication
and software signals - for example: PLC Tag → Network → HMI Server → HMI Tag
→ Display. If the PLC tag is correct, and the HMI server receives the
correct value, but the HMI display is wrong, the investigation can be narrowed
to the HMI tag or display settings. Think of the process of building up
a boundary: Last Known-Good Point → Unknown Section → First Known-Bad Point.
Investigate only the unknown section. This is where the power of
documentation comes in, again. drawings, I/O lists, network diagrams and PLC
logic can assist with identifying exactly what lies between the two points.
Once you know the last good point and the first bad point,
stop investigating everything outside that boundary. This makes the
troubleshooting process much more focused and avoids the all-too-common pitfall
of randomly checking components.
Correct the cause and verify the complete signal path:
Once the physical root-cause has been confirmed, make the
required correction and recheck the entire signal path from start to finish. For
example, if you had a loose terminal that caused a level transmitter signal to
be lost, by simply tightening the terminal you may see the PLC value return.
However, as a troubleshooter, you need to confirm that: Instrument → I/O →
PLC Tag → PLC Logic → HMI, is now showing the correct value throughout the
chain.
Or, if you had an incorrect PLC interlock preventing a pump
start, confirm that by fixing this logic you are now able to start the pump as
intended and that your required safety and process interlocks are still in
place. It is always a good idea to document:
·
What the symptom was
·
Where you found the first abnormal point
·
What you found as the root-cause
·
What corrections you made
·
And how you verified it
As it can be very useful if you encounter the same equipment
or symptoms again.
The overall troubleshooting methodology can be summarised in
the following steps: Understand the signal path → Define expected condition
→ Trace the signal → Find first abnormal point → Separate signal and logic
issues → Verify suspected cause → Narrow the search using last known-good point
→ Correct and verify. The point of this exercise is not just to get the HMI
to display good value or get the motor to run. It's about understanding what
happened and where the signal went badly. Where was the first abnormal point?
Find the first point of failure, prove the cause, correct it, and verify
the complete path.
I have covered the general theory on finding the first point of failure in a PLC-HMI-instrument system. I have also not attempted to cover all the topics related to it, as it can vary from case to case. Once you are familiar with this type of technology, you can easily troubleshoot any issues related to it.
Thank you for reading the post. I hope you liked it and will find a new way in this type of technology.

Comments
Post a Comment
If you have any queries, please let me know